5 Smart Steps to Organize Your iPhone Home Screen for Travel Efficiency
Traveling can be stressful, especially when you’re juggling multiple apps to navigate, translate, and stay organised.
After a recent trip to Japan, I realised how crucial it is to have a well-organised iPhone Home Screen tailored for travel. Here’s a step-by-step guide to setting up your Home Screen for maximum efficiency.
Step 1: Use Smart Widget Stacks
When you’re on the move, quick access to the right information can make a huge difference. Smart Widget Stacks on the iPhone allow you to swipe through multiple widgets in the same space, keeping your Home Screen clean yet powerful. Here’s how I set mine up during a recent trip to Japan.
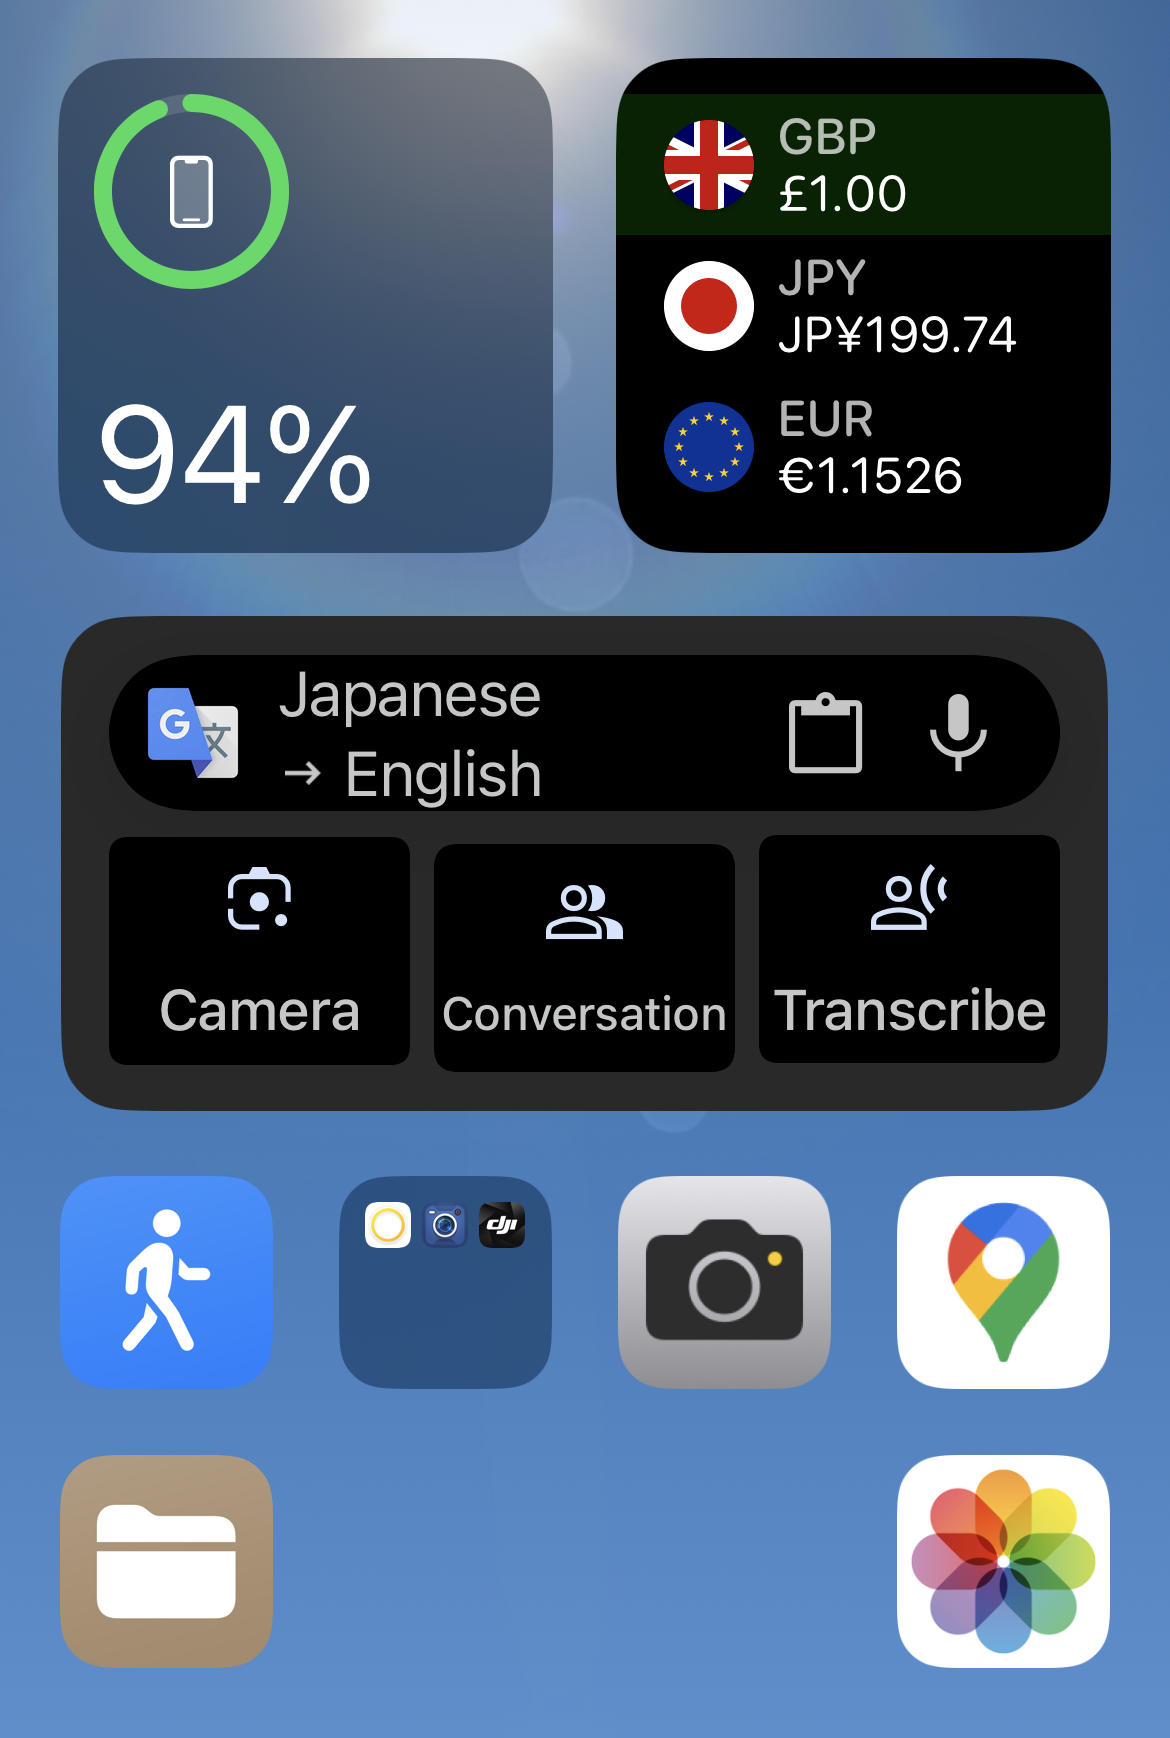
Top Left: Essential Info Stack
- Date Widget
Traveling across time zones can throw off your internal clock. Having the current date always visible helped me stay oriented—especially when dealing with jet lag and itinerary changes.
- Battery Widget
A must-have when you’re relying on multiple devices all day (iPhone, AirPods, portable Wi-Fi, etc.). This kept me aware of when to recharge, especially during long day trips.
Top Right: Currency Conversion
- Currency Converter Widget
I used a simple, ad-supported app that offered a quick-glance widget for exchange rates. Whether I was browsing snacks at 7-Eleven or souvenir shopping, I could convert prices in seconds—without opening the app.
Center: Large Widgets for Travel Essentials
- Weather Widget
Knowing the forecast helped me plan outfits and carry an umbrella when needed. Super useful for deciding whether to walk or hop on a train.
- Time Zone Widget
I added time zones for my home country and key travel destinations to coordinate calls and stay in sync with friends abroad.
- Google Translate Widget
One of the most-used tools on my trip. I used this for:
- Translating signs and menus
- Live camera translation
- Showing translated phrases directly to locals
Real-life win: At a local 7-Eleven, I used the Translate widget to read product labels and the Currency Converter to double-check prices—all from the Home Screen.
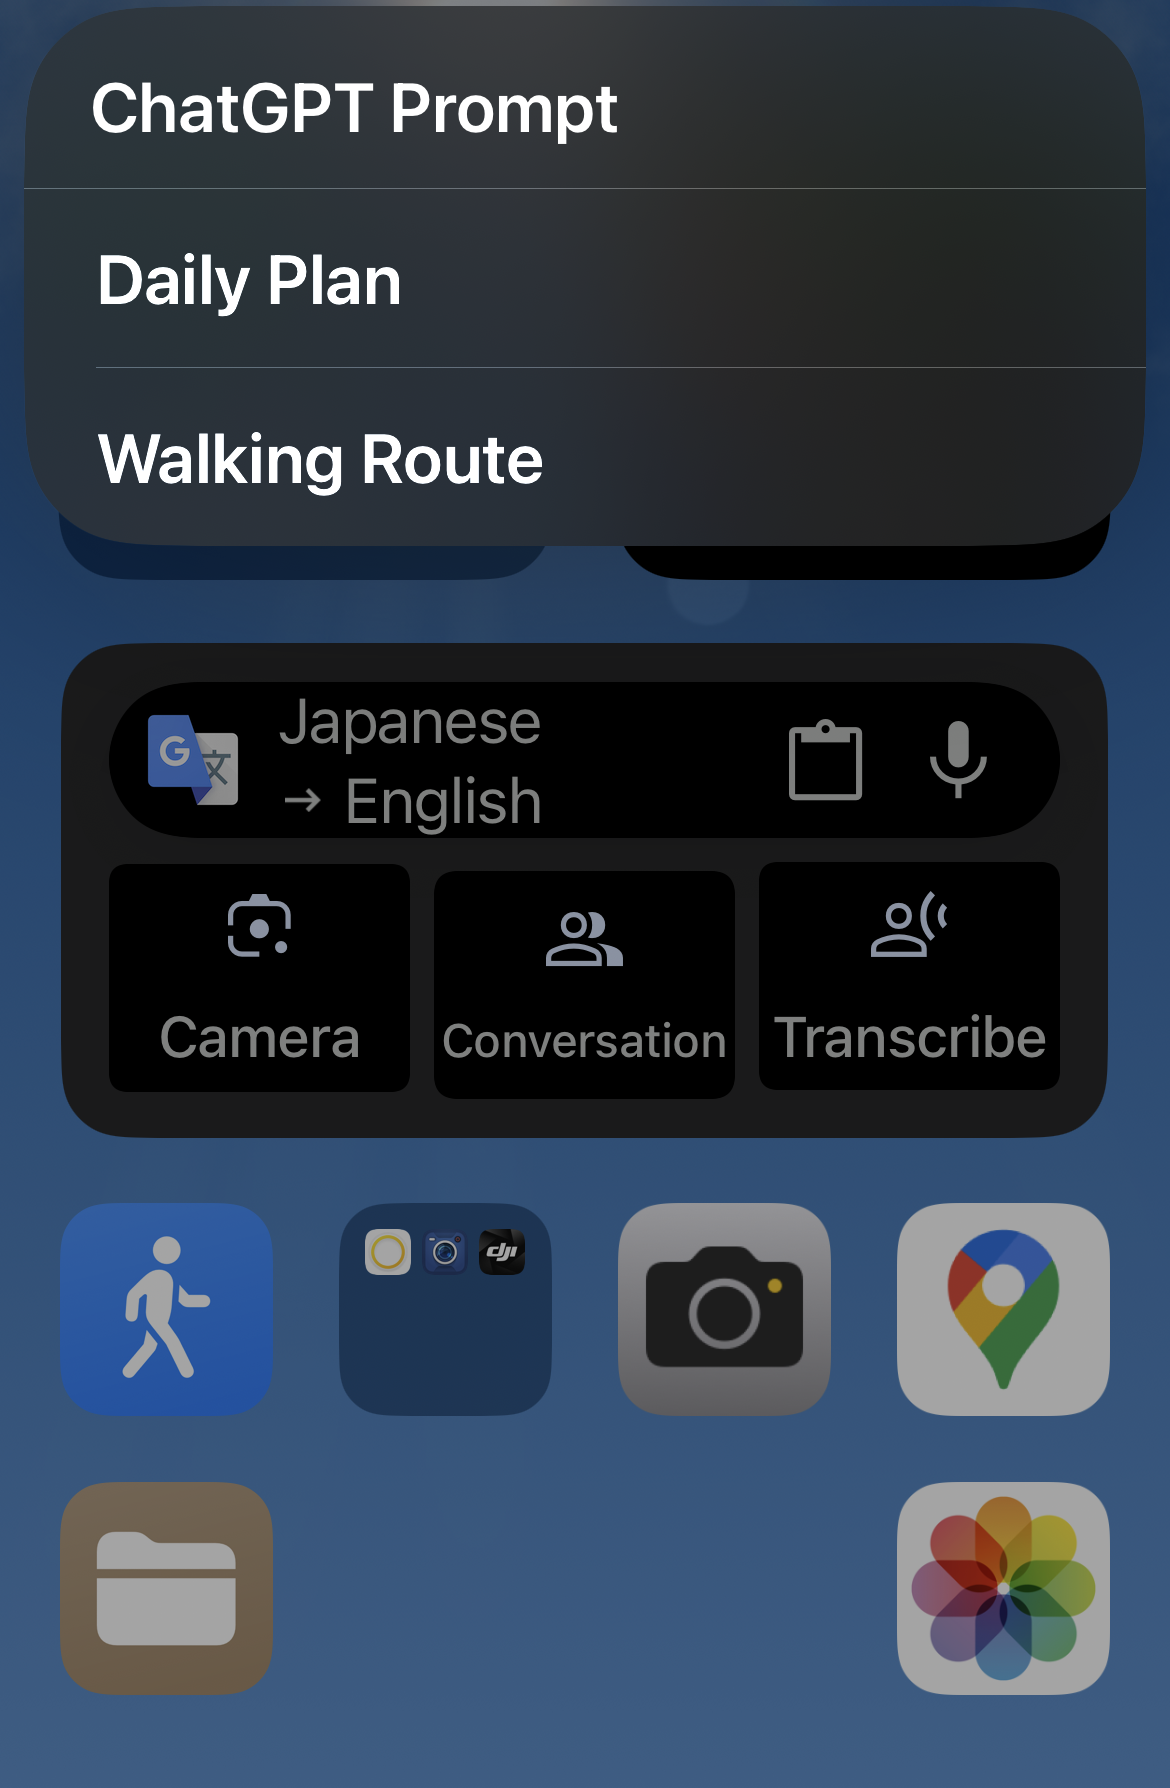
Step 2: ChatGPT as Your Personal Travel Guide
ChatGPT has become one of my favourite travel tools—like having a personal guide in your pocket. With the right prompts and setup, it can handle everything from itinerary planning to quick research on the go.
Here’s how I used it during my trip:
- Custom Daily Itineraries
I asked ChatGPT to build daily plans based on my destination, travel dates, and interests. It suggested top attractions, estimated travel times, and even meal ideas—all organized by day and location.
- Walking Tours On Demand
Sometimes I just wanted to wander without missing key sights. I asked ChatGPT for a 2-hour walking tour starting from my hotel—and it generated a route with stops, local highlights, and timing tips.
- Streamline with iOS Shortcuts
I created a custom iOS Shortcut to quickly send prompts to ChatGPT and save the responses directly into my Notes app. This was especially handy when I needed offline access or wanted to pull up ideas later.
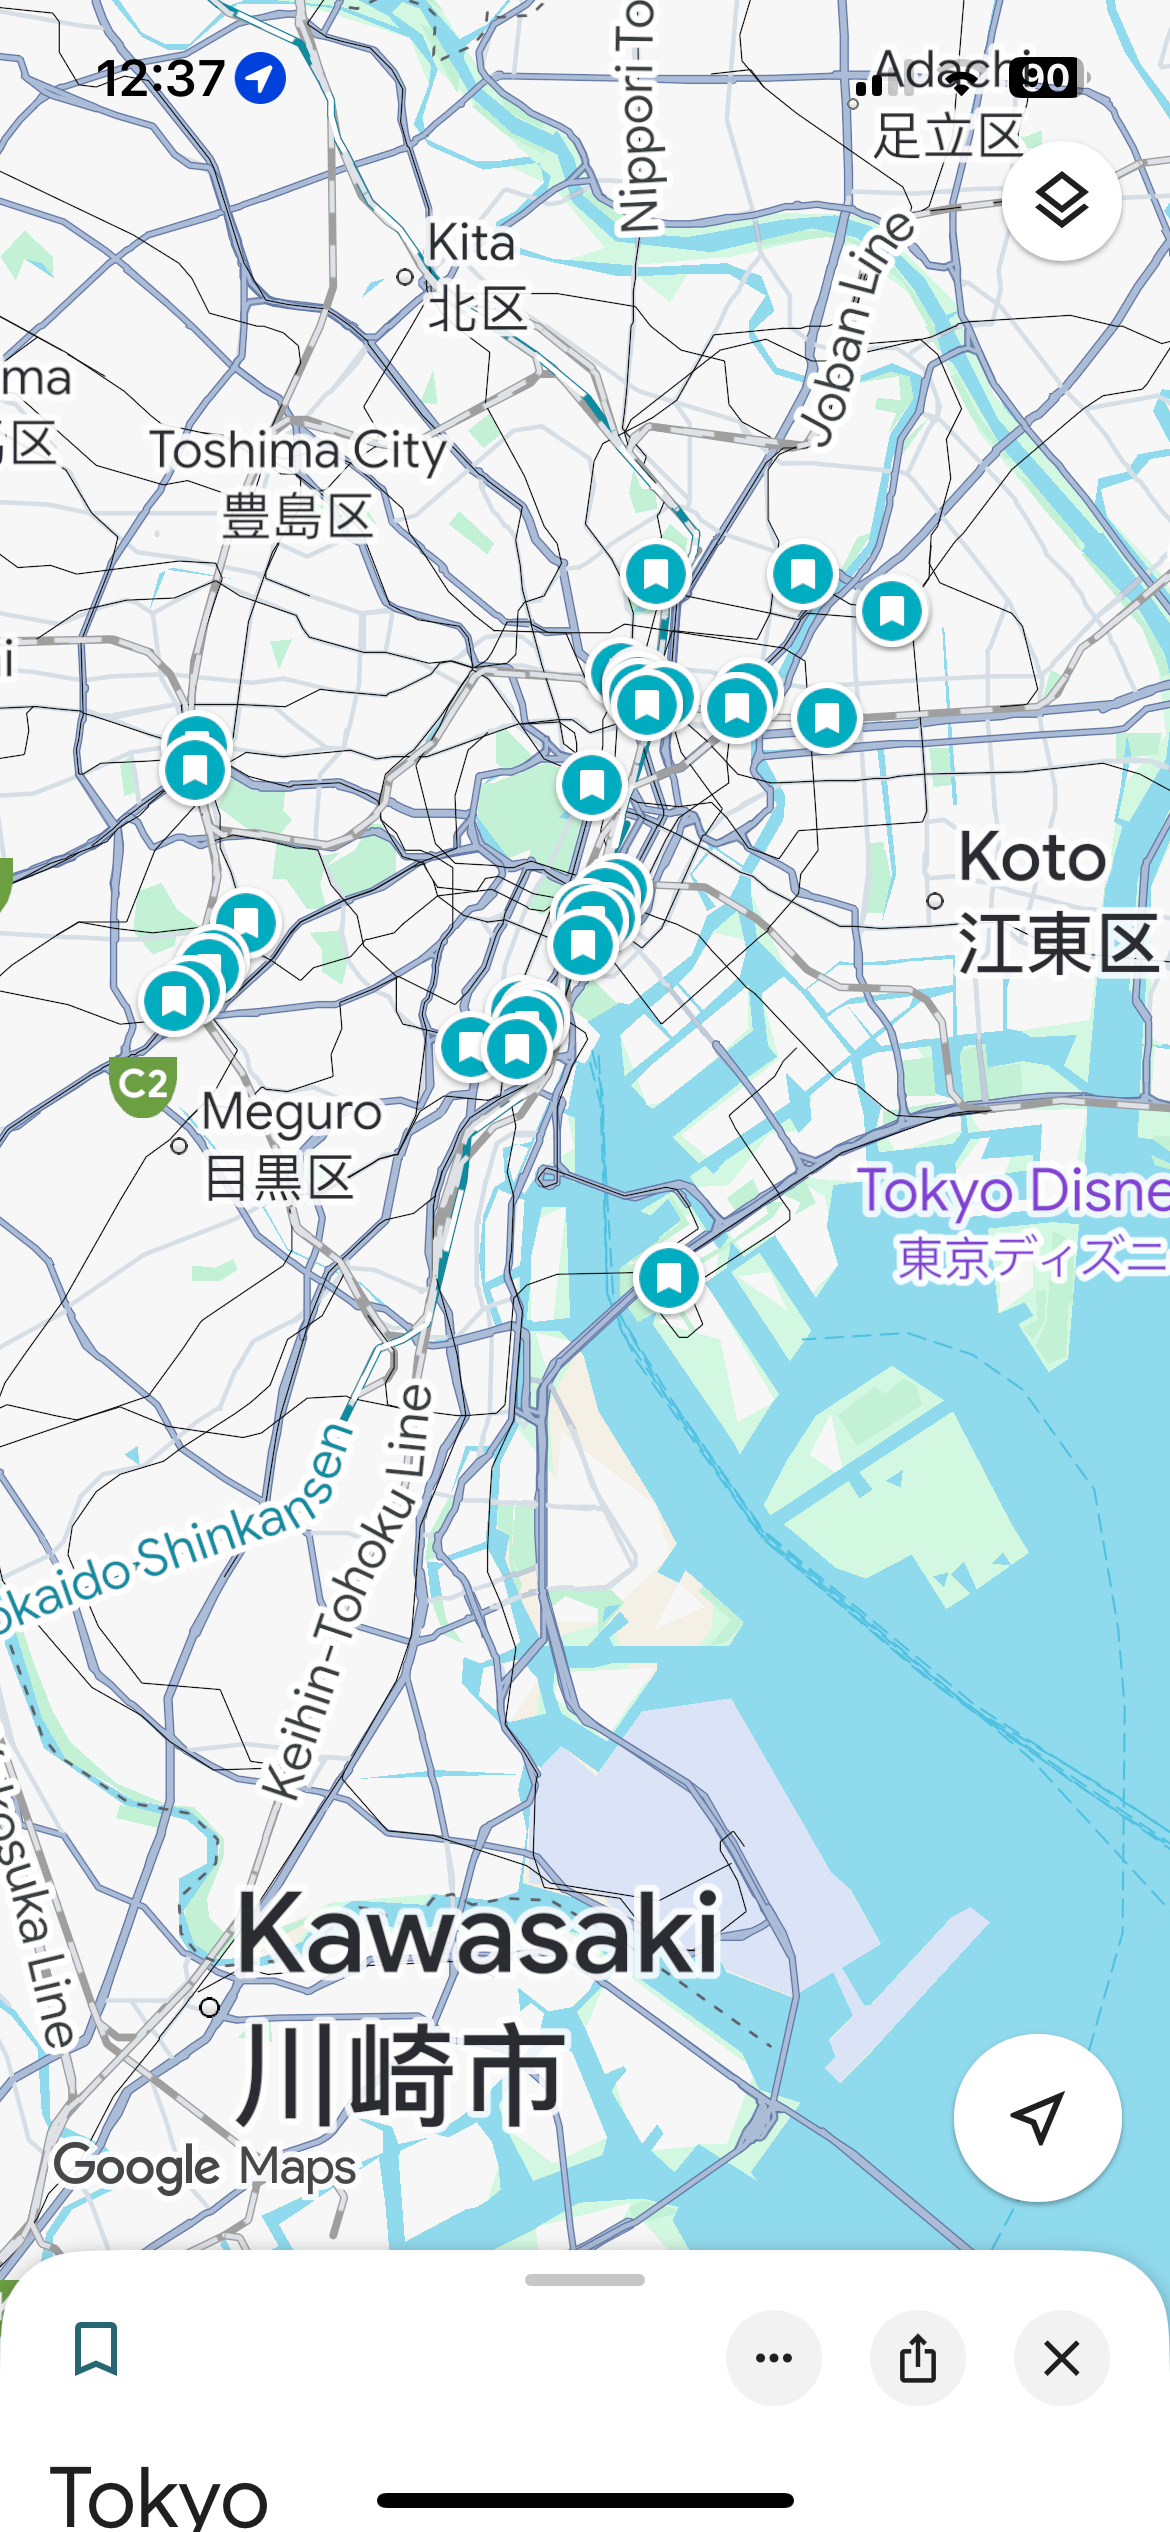
Step 3: Master Navigation with Google Maps
When you’re in a new city, Google Maps becomes more than just a navigation app—it’s your local guide, public transport planner, and offline map all in one.
Here’s how I optimised it for travel:
Save Your Spots Before You Go
- I created a custom “Japan Trip” folder in Google Maps and pinned all key locations: hotels, train stations, restaurants, sightseeing spots—even convenience stores.
- This made it easy to navigate between stops without searching addresses every time.
Download Offline Maps
- Before leaving for each new city, I downloaded offline maps. This saved me when mobile signal was weak.
- With offline access, I could still get directions, search places, and find saved pins—no data required.
Navigate Public Transportation
- Google Maps was incredibly reliable for figuring out local trains and subways.
It gave me:
- Exact train lines and platforms
- Departure times and real-time delays
- Transfer instructions in English and even which carriage to use.
Pro Tip: I added a direct Google Maps link to my folder so I can share places I went with other people.
Step 4: Create a Dedicated Travel Notes Folder
The Notes app might seem basic, but when used right, it becomes your personal travel dashboard. I set up a dedicated folder just for my trip to Japan—and it turned out to be a lifesaver.
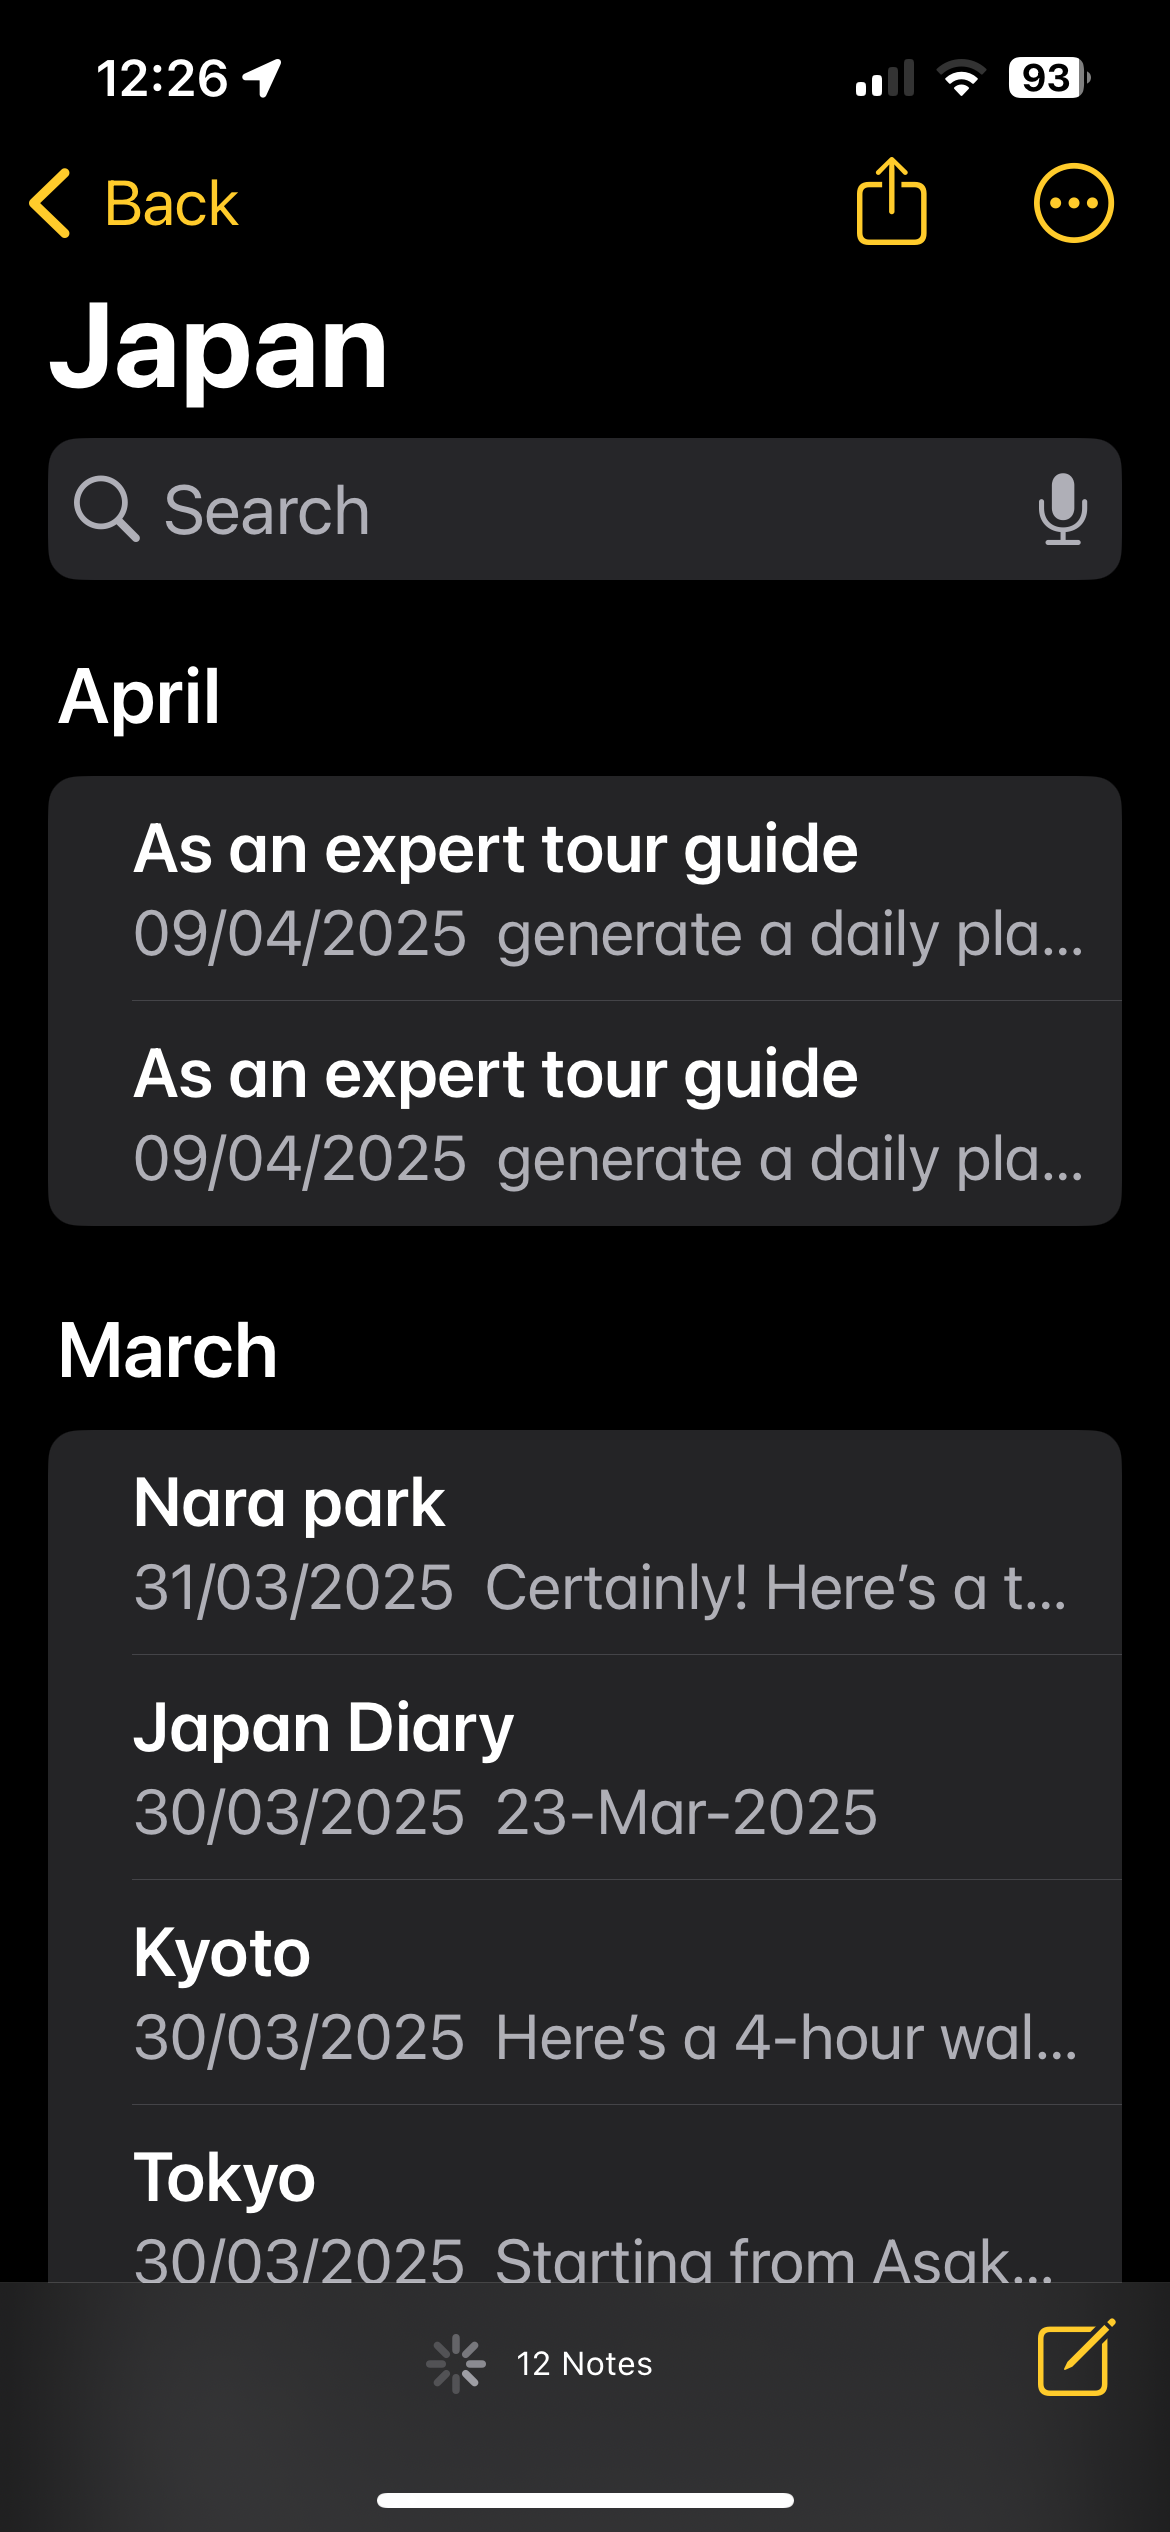
Here’s what I included:
Quick Reference Translations
- I saved commonly used phrases like “Where is the train station?” or “I don’t eat meat” for offline access.
- These came in handy when I didn’t want to open a translation app or needed to be discreet.
Travel Logs & Memories
- Each night, I jotted down a quick travel log—what I saw, what I ate, how I felt.
- It helped me remember the little moments and made sharing my trip later so much easier.
Tips & Local Hacks
- I collected advice from Reddit threads, blogs, and locals and stored them here.
Things like:
- “Buy a Suica card at the airport.”
- “Convenience stores are great for affordable meals.”
Important Travel Info
- Hotel addresses in both English and Japanese
- Reservation details
- Notes for filling out my Japanese visa form (e.g., emergency contacts, accommodation history)
Saved Itineraries from ChatGPT
- I pasted ChatGPT-generated walking tours and day plans directly into Notes, making them easy to reference—even offline.
Pro Tip: Pin your most important notes—like hotel details or phrases—to the top of the folder for instant access.
Step 5: Quick Access to Camera & Photo Apps
Travel is full of spontaneous moments, and having your camera apps front and center makes it easy to capture them without delay. I customised my Home Screen to prioritise photo tools I used most during the trip.
Essential Camera Placement
- I kept the iPhone’s native Camera app on the dock for instant access—no swiping or searching.
- This helped me capture fleeting moments like street performers, meals, or quick shots of train schedules.
Organise with Photo Apps
I also added a couple of helpful photo apps to my Home Screen for quick editing and organization during downtime:
- Google Photos or Apple Photos:
For backing up and organising images as I went. I often sorted photos by day or location while waiting in cafés or on trains.
- Photo Editing Apps (like Snapseed or Lightroom Mobile):
Perfect for making quick edits before posting or saving to an album.
Bonus: Use Albums to Stay Organized
- I created custom albums like Tokyo Day 1, Kyoto Temples, or Food Finds so I could easily find photos later—or quickly show friends highlights from a specific part of the trip.
Pro Tip: Set up a “Travel Memories” album in advance, so you can save your favorite shots in real time as you go and share with your love ones.
Bonus tip
Save this Home Screen layout and activate it only when traveling to avoid clutter during everyday use. I did this by creating a Travel focus and adding the Travel home screen.
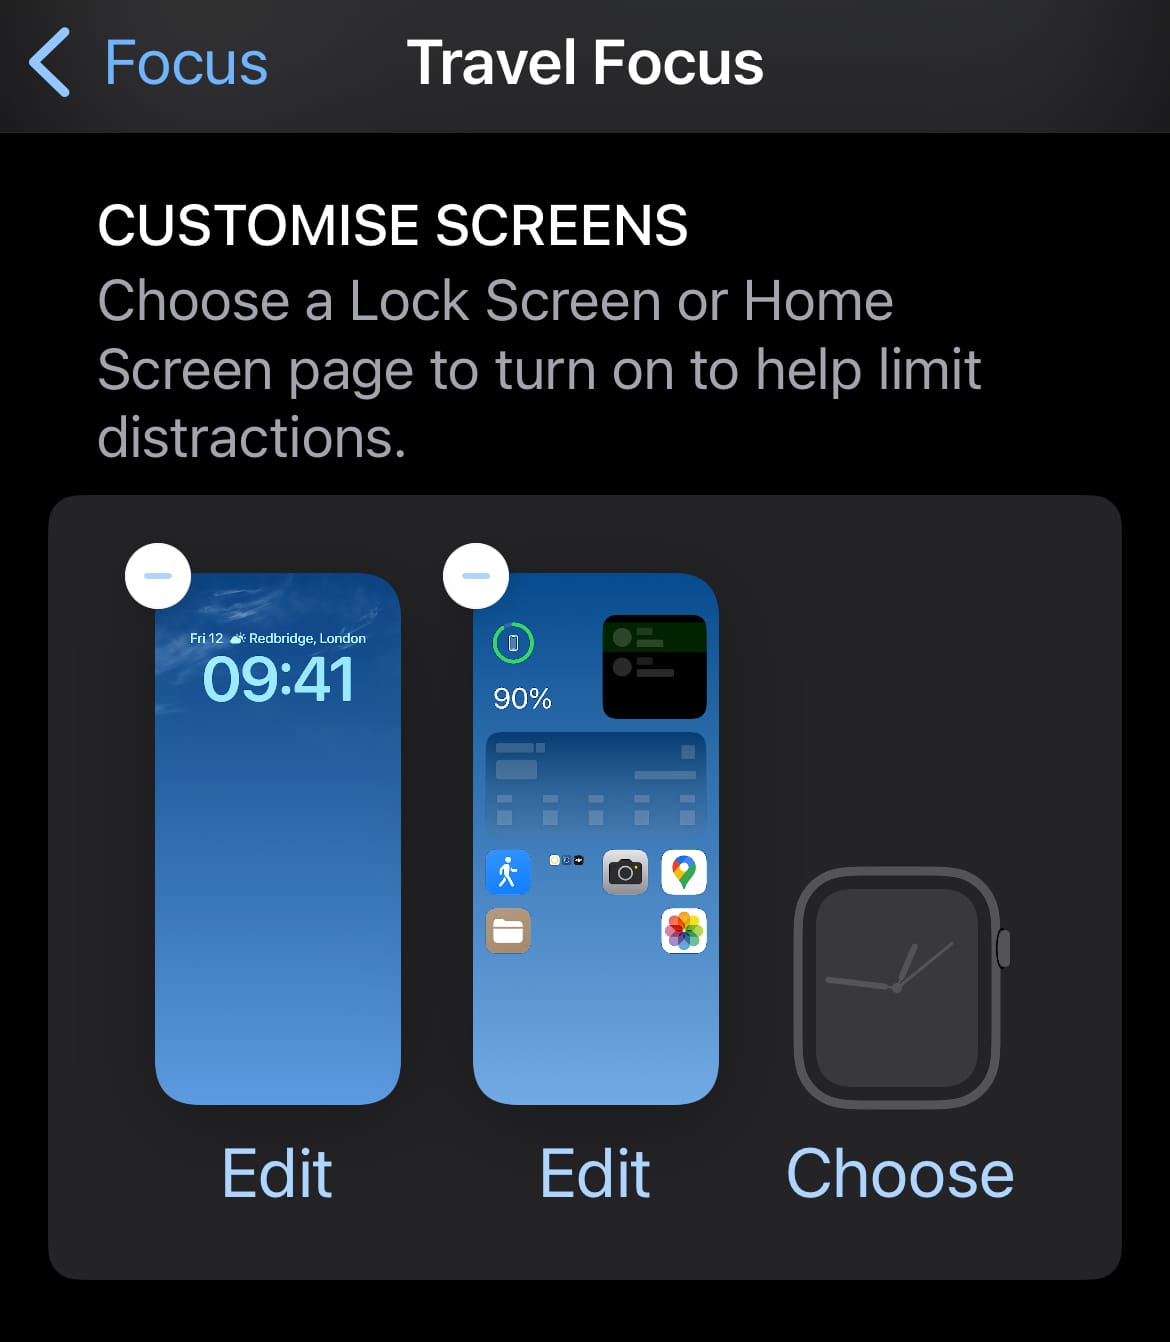
This feature is useful for different parts of your trips. When flying I initially had a flight tracker app to monitor delays due to a fire at Heathrow, but I moved it to its home page after since I no longer needed it after my flight.
Organising your iPhone Home Screen for travel doesn’t just save time—it reduces stress and enhances your overall experience. By focusing on apps and widgets you’ll use daily, you can create a streamlined setup that works for you.
What’s your go-to travel app? Share your tips in the comments below
Don’t forget to test your setup before your trip to ensure everything works seamlessly. Happy travels!